- [email protected]
- Fayetteville, Georgia
Producing Your Book - Part 3
Wrapping It All Up – Covers
Ah, the all important cover ...
They say that you can’t judge a book by its cover, but for chidren’s books you really do need a great cover. Who’s going to open up a book with a lousy, uninteresting cover? I mean, if the cover is blah, how blah will the inside of the book be .... oops! ... wait a minute! ... back up ...
We’re not discussing designing the cover. We’re discussing producing the cover!
We’re going to need a little disclaimer here ... I’m no cover-manufacturing genius. I’ve never seen the actual process. So this will be be a very un-technical, practically sub-layman discussion. But we will cover enough that you will understand how to set up your electronic files and why they are set up the way they are. We’ll start out with the standard hard and soft covers your self-publisher wants you to purchase. Then I’ll show you just a couple more options you might consider if you are going solo and contracting the printer yourself.
Okay, the inside pages are printed and now it’s time to add the cover. The normal two options at the self publishers are hard covers and soft covers. Let’s take a look at each one and see how to set up the files. Please note that these instructions are just guidelines. Check with your own printer/publisher for exact measurements and what they need before sending files to them.
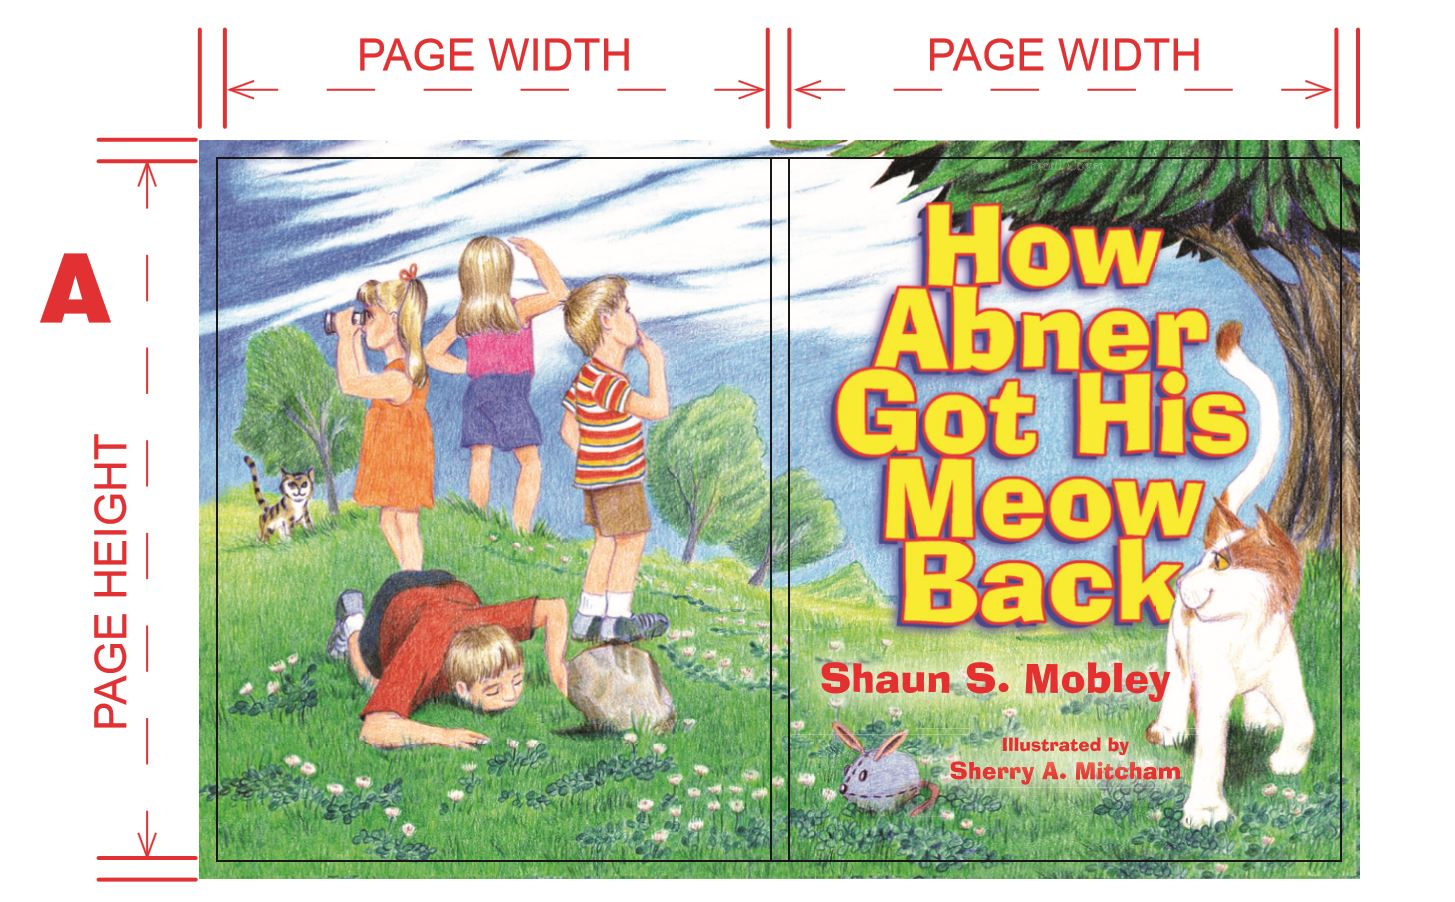
A – Soft Cover
In the diagram at right, the black solid line is the trim line, the actual size of the finished book. In the middle between the front and back cover is the Spine. Beyond the trim line is the Bleed. The Bleed area is usually .25” wide. Some printers will go as small as .06”
Soft covers are also called “wrap around” covers. They are printed on a heavier, glossy card stock. Back, Spine, and Front are all printed on one sheet. The cover is glued at the Spine to the inside pages. This is more apparent in the thicker book in the photo below.
B – Hard Cover
Hard covers are printed on lighter, glossy paper that is then glued and wrapped onto heavier board. The edges wrap around the board to enclose it. The inside pages are glued to the end papers at the spine area, similar to a soft cover, then the end papers are glued to the inside front and back covers, covering the wrapped edges of the printed cover. The biggest diff erence between the soft and hard cover files is the size of the Bleed/Wrap area, because the extra is needed to wrap around the edges. The Bleed/Wrap area on this file is usually 1” and larger.
The dashed lines beyond the spine in Example B is the Gutter area. That’s the area where the book is crimped to help hold the inside pages. Your printer/ publisher will tell you how wide this area is. Keep type and important graphic elements out of this area.
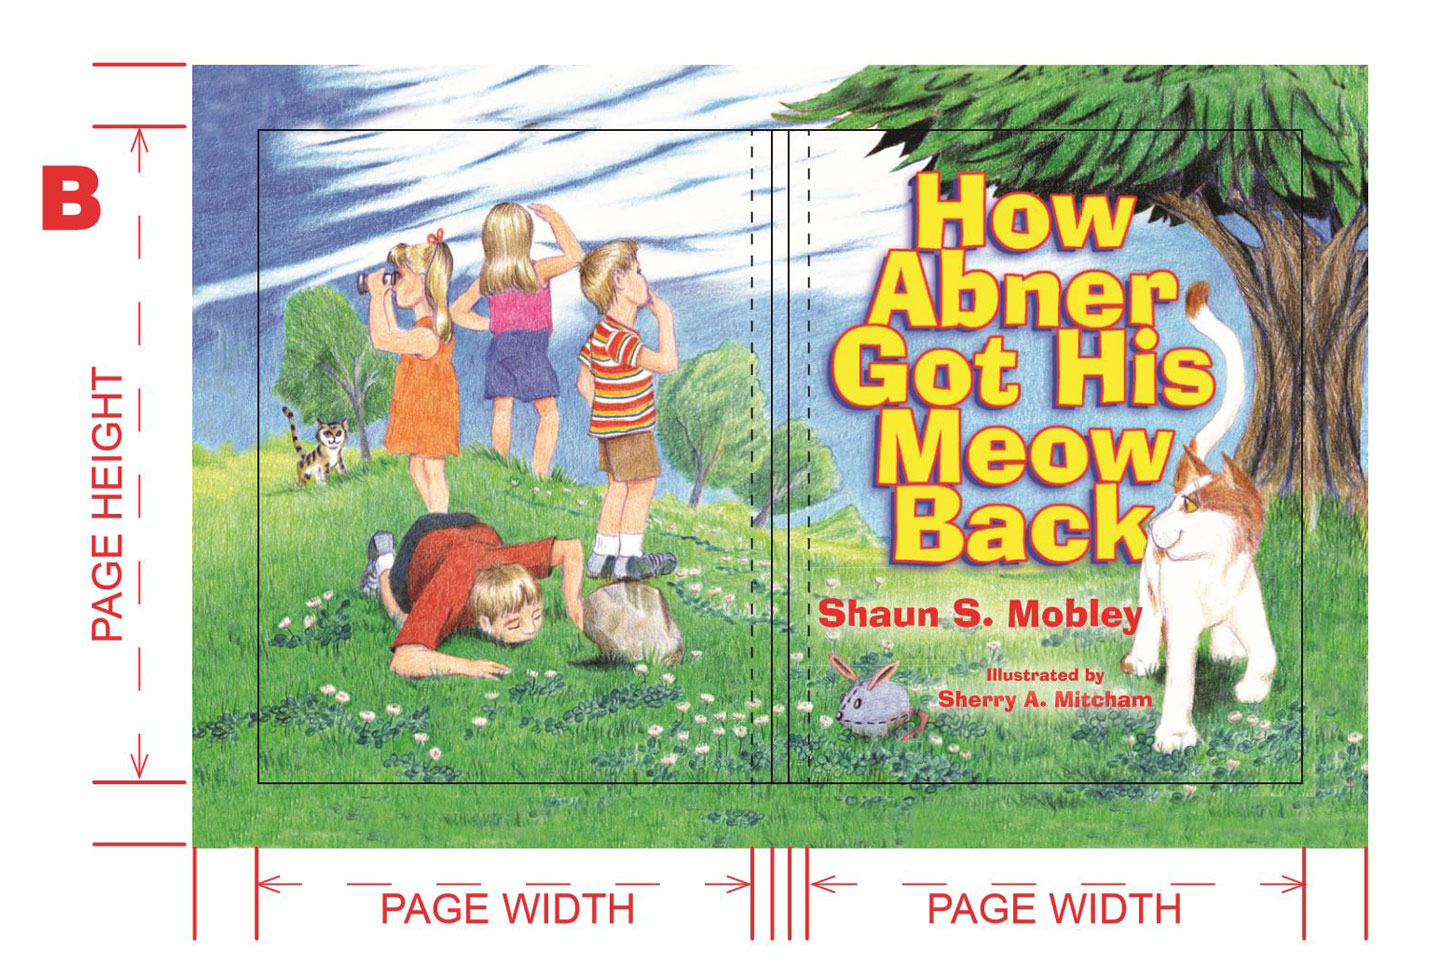
* A special note to illustrators here: You can see in my example the large amount of Bleed/Wrap you will need in the file for the hard cover ... always find out in advance the measurements for these large bleed areas and make sure your drawing extends out far enough to give you what you need!
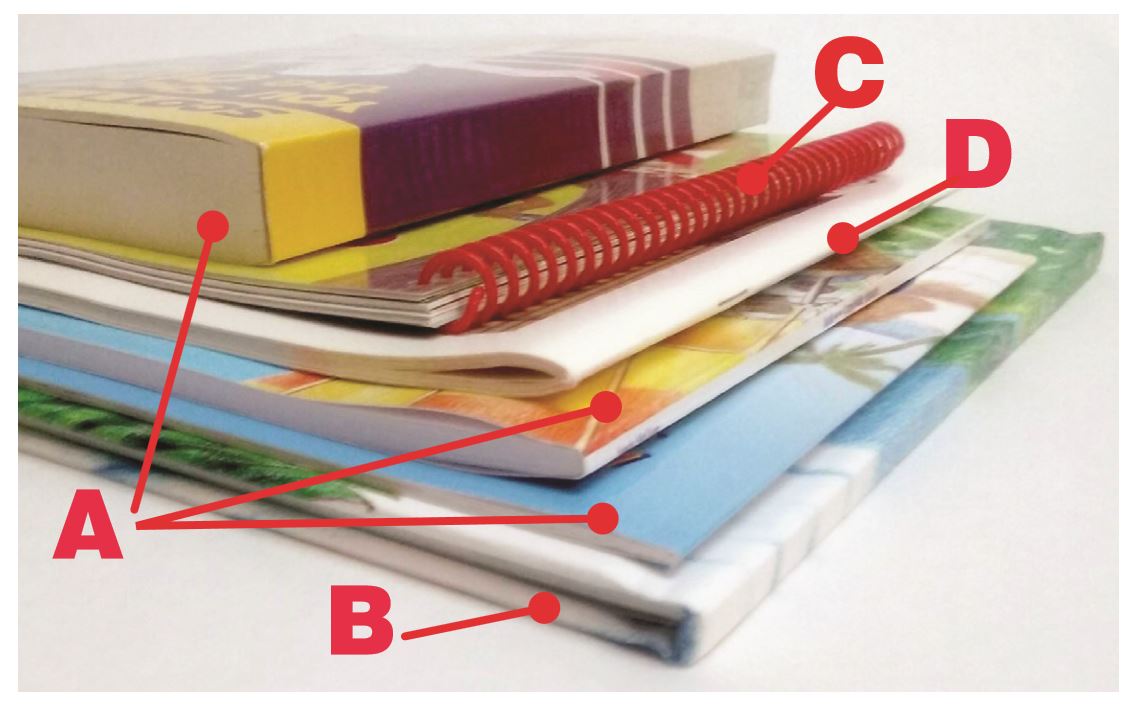
C - Coiled Cover
Not many children’s books are produced with coiled covers. The books you see mostly with coils are the ones for very young children that are printed on heavy board. They almost have the look of a “toy” book. It’s not really the traditional look for a standard children’s book, but there are certain times when a coiled cover would be terrific, because a coiled book can do things a bound book cannot ... like lay perfectly flat when open. Or fold back on itself. And the coils can be wire or plastic, and come in an array of colors to coordinate with your cover design. Coiled books look a little less formal than traditionally bound books, so use them for fun, humor filled books. And fill them wall-to-wall with lots of color!
Use coiled books for:
- Read aloud books that can easily be held wide open for better viewing.
- Instruction books, like cook books, craft books, study books, puzzle books, that will lay flat while you’re gluing parts together or cutting up fruit for your smoothie!
There’s no special worries when laying out electronic files for coiled books. You essentially just need single pages, with bleed. On the inside edge of the book, where it will be punched and coiled, just leave yourself an adequate margin to accomodate the holes and keep typed copy or important elements out of that area.
The inside pages can be printed on any good quality paper you’d use in any other book (I always advise gloss for color). The cover can be on heavier gloss cover stock. Or, what was done on The Chipmunk Family Odyssey book ... print the front and back cover pages on the same paper as the inside pages. Then have the front and back cover pages laminated. It makes for a nice, heavy cover and withstands lots of handling and fingerprints!
D – Saddlestitched Cover
“Saddlestitched” is just a fancy word for “stapled”! It is the most economical of all the bindings. Especially if your book is being digitally printed. Files for saddlestitched books can be simply laid out in consecutive single pages. Insert blank pages where needed. A digital press can be told to assemble your single pages into book form. Most digital presses will fold, staple and trim the book and spit it out completely finished. Instead of a stack of individual pages, the pages sit together, side-by-side and then they are folded in half and stapled in the middle. Books most often saddlestitched are coloring books, puzzle books, work books, etc.
When the cover of the book is printed on the same paper as the inside pages, it is called a “self-cover” book.
In digital shops, when the cover is printed on heavier paper, it is printed first. Then, when the inside of the book is printed, the covers are put into a special tray on the press. As the book is printed, the press will “pull” a cover for each book before folding, stapling and trimming. In an offset shop, everything is printed flat, and taken to the bindery department where it is collated, folded, stapled and trimmed.
Depending on the number of pages and the weight of the paper that is used, saddlestitched books can get bulky. Some digital presses have an added feature called a “square fold”. Instead of just one fold, the machine makes 2 folds, just a small distance either side of the center, then staples the book in the center. The finished book has the look of a thin bound book, but is actually saddlestitched.
Occasionally, with bulkier books, there may be an issue with images on the outer pages moving toward the center. The print term for this effect is called “creep”. The images don’t actually move, of course, but because of the bulk, the images on those pages won’t be positioned correctly when the books are trimmed. The solution, beginning with the center spread and moving toward the outer pages, is to incrementally shift images away from the center fold, shift ing a greater amount on the outer pages. Some soft ware programs will figure this out for you. You can also consult with the printer for the shift amounts.
A Quick Check List When Preparing Files For Picture Book Production For the Graphic Artist/Illustrator
Before Drawing or Layout even begins ...
- Know the finished dimensions of the book.
- Find out if the book will be printed off set or digitally.
- Know how the book will be bound.
- Know the required measurements of all bleeds, wraps, shifts, etc. Then create the layout and illustrations to accomodate for those measurements. You probably won’t know the spine measurement until the publisher/printer knows the page count and the paper to be used, so allow some wiggle-room.
- Know the required size and placement of the Barcode on the back. Draw/plan illustrations around that.
- Some authors will only print soft cover. Some will want both hard and soft cover. I began after a few books to just go ahead and make a file for both. When you are designing and setting up files for a book, it’s easier when that book and those images are in your brain and thoughts to just take a few minutes and set up both files. If they only want a soft cover now, then 6 months later they want to add a hard cover, you’ll be good to go!
Before Sending the Final Files to the Printer ...
- Keep the original files and make duplicate files for the printer. Label all printer files with logical names to make it easier on their end.
- If you have been working with spreads (two facing pages, left and right pages), change the printer’s file to individual consecutive pages. Insert blank pages where needed.
- Get any guidelines or parameters from the printer if they publish them.
- Know what kind of file format the printer needs.
- Make certain all raster images are 300dpi at minimum.
- Convert all typed copy and fonts to art.
- Make certain all color images are cmyk.
- If you use a cmyk mixture for richer blacks, make certain that’s acceptable for the printer. If not, accomodate the printer’s needs.
- Gather together all links and fonts to send them as back-up, just in case! And, yes, I know we converted the fonts to art ... but you are dealing with machines ... machines are full of hormones, if you get my drift , meaning they don’t always do what they are supposed to do ... so send the fonts you used, just in case!