My daddy used to yawn and stretch, and he'd always say, I'd stretch a mile if I didn't have to walk back!
That's a long stretch!
But hang on ... we're about to do some stretching of our own ...
In our Planning Your Book series, we've been going through the process of designing and laying out a picture book, start to finish. Here in Part 4 it's time for rendering the illustrations. This is the fun part – albeit long and tedious – making that book come to life!
Be thankful it's for illustrations on only 4 spreads. An actual picture book will be a minimum of 24 pages – and more likely 32 pages – which will require 12 to 16 spreads. That's going to take a while and be a whole lot of work!
In this article I will show you the procedure I follow for making multiple illustrations for a single book. I work in colored pencil, but this procedure will work no matter what medium you prefer. The real challenge is making the art on all those spreads look cohesive. You don't want to make 12-16 individual pieces of art. You are making one book, by making 12-16 scenes from the same story. Characters and backgrounds need to stay consistent throughout.
There are 2 steps to making this happen:
1. Read the narrative carefully and make certain that the art reflects what's stated.
If the narrative says that the main character, Sam, has a dog, but doesn't specify a breed, you are free to make up what kind of dog he has. Give him something that matches his personality and what he'd be likely to have. If he's the town bully, how about a german shepherd or a pit bull? Something tough like Sam. Maybe Sam's outdoorsy and likes to trek through the woods ... how about a chocolate lab or a hound dog? However, if the narrative says Sam's dog is a golden retriever or a black french poodle, make sure that's shown in the pictures.2. Art style, characters and backgrounds need to look the same throughout.Sam – as well as all of the characters – on page 6 needs to be recognizable as Sam on pages 18 and 25 and anywhere else he appears. If Sam has 3 shrubberies in front of his house, don't draw him standing on his front lawn and only show 2 shrubberies. If you're drawing those shrubs and they look a certain way on page 8, then on page 12 you try a different technique or different colors, they won't be the same. By all means be creative and experiment ... but decide what you want before you do the final art, and then render all instances of the same characters or elements on all pages the same way.
So step 1 – reading the narrative closely – should be obvious: make the text and illustrations match up. This is part of what we've been discussing in the first 3 parts of this series. Illustrators have a bit of leeway here and opportunity for some creativity. Perhaps the text doesn't mention at all that Sam has a dog, but adding a dog in the illustrations might really add to the story. The reader gets some more information about Sam (he's a dog lover/owner!) and a little dog quietly appearing in illustrations over several pages in different positions and expressions can have a unifying and clarifying effect on the story as a whole. This is the magic of a good illustrator making a story come to life by adding to and enhancing the narrative. So let that creativity flow when planning the pictures!
Here I'll show you how I achieve step 2 ... a unified picture book.
Illustrating a whole book is a daunting task. A dozen or more finished pieces of art will take a while. I discovered that when I drew a character on one piece, then 2 weeks later when I tried to draw the same character again, it was difficult to match up colors and the general look and energy of the character.
So I came up with a system for myself that works quite well. Let's finish up our illustrations for our Gator Joe story and I'll show you how I work ...
The best solution I’ve found is to take the characters or elements that appear multiple times, and render all instances at the same time ... usually beginning with the characters.
So we’ll begin here with Joe and Allison ...
The Main Characters First
Joe appears 4 times:1. Flying on page 5Allison appears with him:
2. In bed on page 7
3. Falling on page 8
4. On the shore on page 9
1. In Joe’s dream on page 7
2. On the shore on page 9
They are also among the tiny figures under the tree on page 6, and running down to the water on page 8, but I’ll do those later along with the other characters.
Here I’ve zoomed in so that you can see ... everything I do to them will be done to the other instances at the same time. This keeps everything about them – coloring on skin, hair, clothes – consistent everywhere they pop up.

Secondary Characters
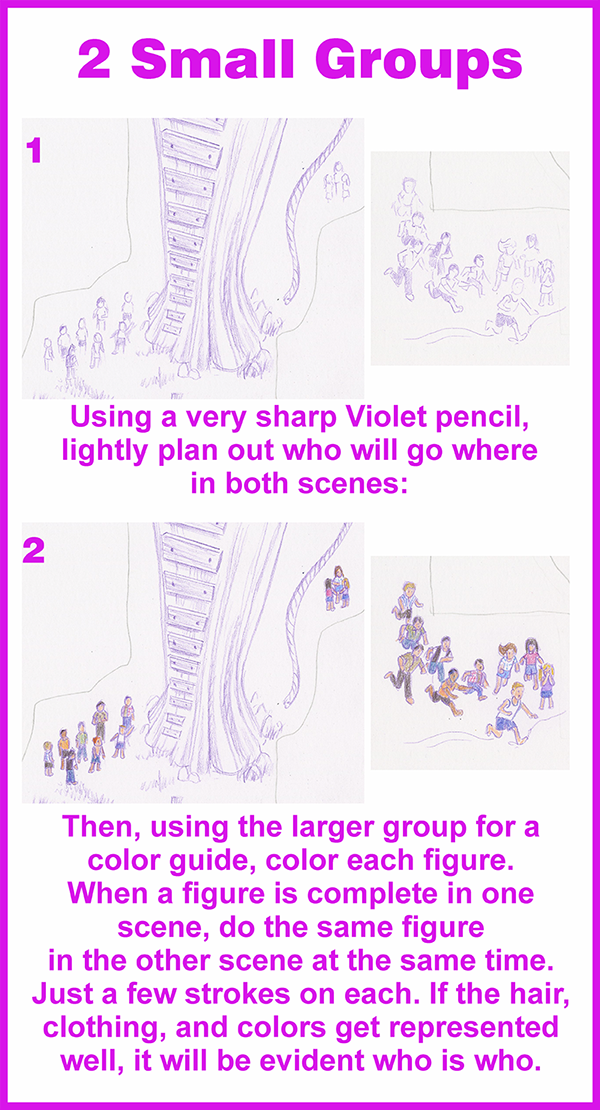
The other kids are all in a group on page 9 where they’ve just pulled Joe out of the water. They also will be in small illustrations on page 8 and in the very tiny figures at the base of the tree on page 6. They will be so small on pages 6 and 8 that there won’t be much detail. So let’s do the big group first, then use that as a guide for rendering the smaller figures.
Because our tiny book is so tiny, and since this is the only place we see the other boys and girls, it won’t make much difference what we do with them. If there were more pictures of them, on more pages, it might be necessary to make them recognizable specifically as Sam, Tommy, Mike, etc. I did try to make Butch a little obvious by placing him right in front of Joe. Butch will also be leading the pack on their rush down to the water on page 8.
For the other boys, I just made certain to have the right number of them. I actually have one extra, which won’t matter. And a couple of girls that hang out with Allison.
Just have fun and make them all look like distinct individuals:

Everything needs to be colorful, because the whole group is a unit. But just a tad softer than Joe, Allison and Butch, to keep those three the focal point.
Then the Smaller Groups
The 2 other groups of kids on page 8 and under the tree on pages 6-7 are so small, there won’t be much detail. But now we know what they look like! So a few marks with appropriate colors will help identify them ... mostly by clothing and hair styles and colors.
I won’t show every single stroke on these ... they will get done in 2 steps ...
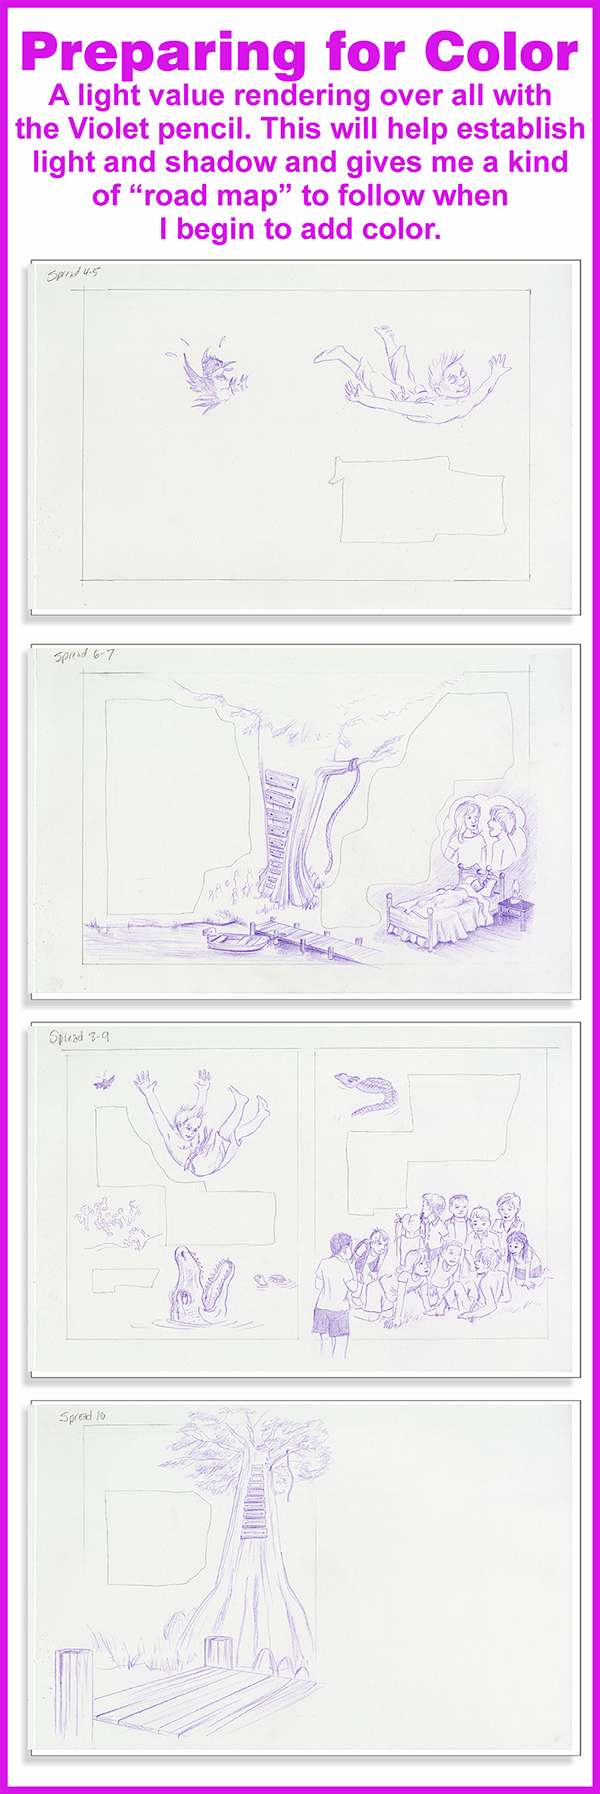
Joe's Bedroom
I love doing little scenes like this! Joe lives out in the wilderness in the early 1900’s, so a handmade quilt on the bed and an oil lamp are just the thing!

Grounds and Water
These 3 spreads were done all at the same time, just like the characters. When I put Grass Green on one, they all got it. Then Tuscan Red on all 3, etc. To hopefully make them more visible on screens, I'll show them one at a time.
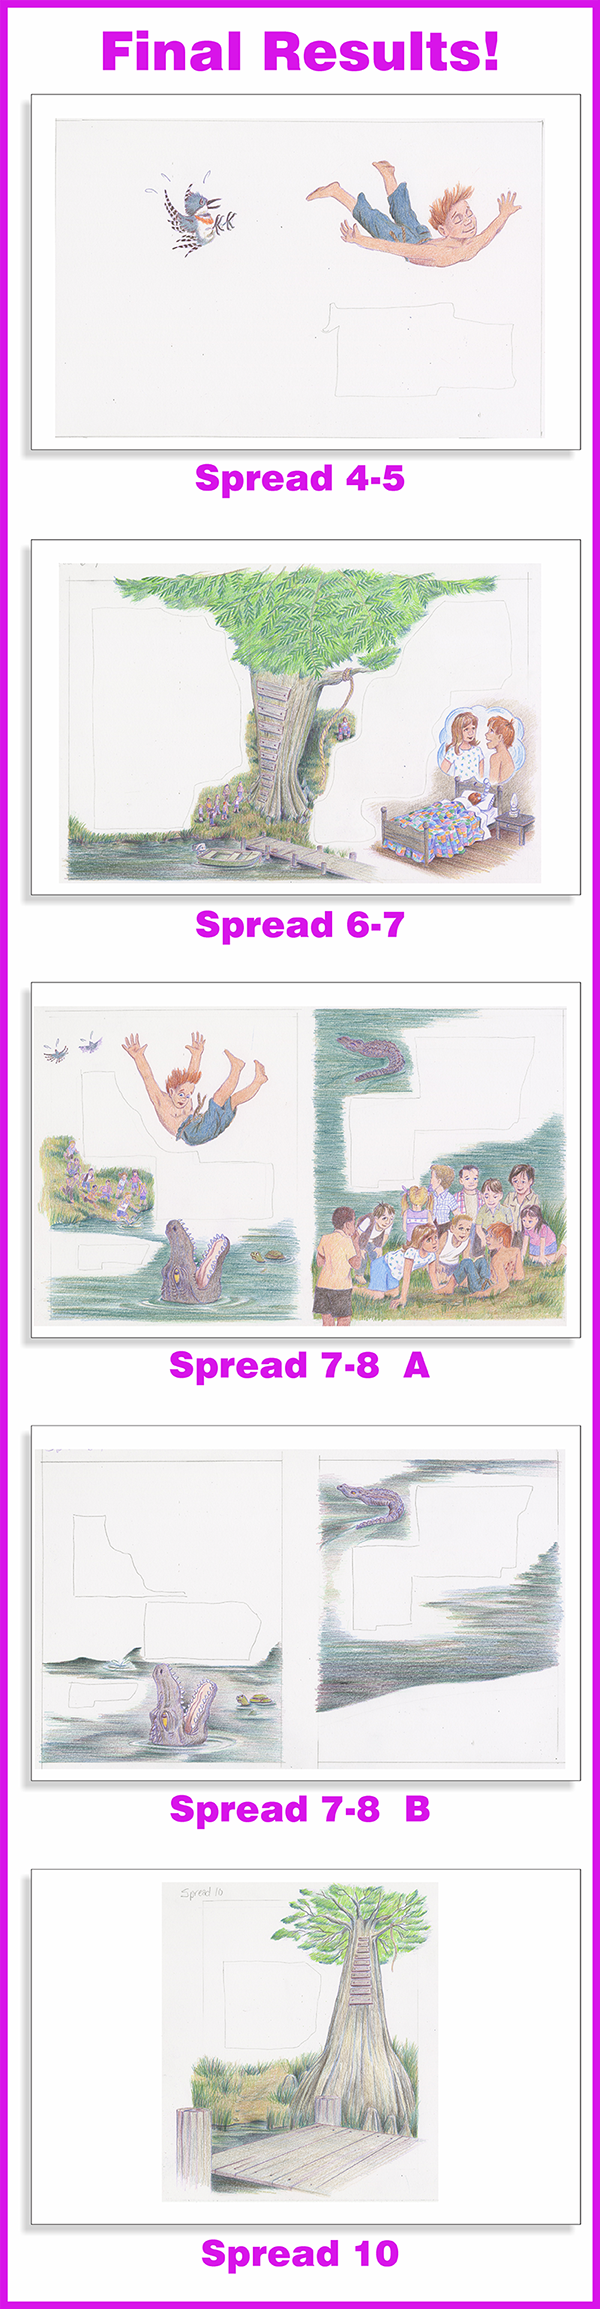
Here's the first Spread with pages 6 and 7:

And the last Spread with page 10:

The whole idea of working this way is to keep consistency. Nevertheless, you will find that it's still quite possible to make blunders!
When I got finished with these 3 spreads, I just wasn't happy with pages 8-9. It actually doesn't look too bad on the computer screen, but on the actual art, the way I rendered the water is much too dark and heavy. It doesn't look at all like the water on the other two spreads.
But not to worry ... it's totally fixable! And I won't need to re-draw any of characters on those pages ... though I did opt to redraw the 2 alligators and the turtle just for convenience. I'll re-do the water, and when all the art is scanned into the computer, I'll simply replace the background behind the characters ... easy!
Of course, it's good to be extra careful to not make mistakes, but they will happen occasionally. On this planet anyhow!

Finishing Up!
Now we're in the home stretch ... just need to finish up that glorious cypress tree!
Again, I did these simultaneously, but I'll show them here in 2 separate graphics, so the details are visible ...


And voila! We have illustrations for our book!
Are you worn out yet? Go rest up, because we're not done yet!
In Planning Your Book – 5 I’ll show you some tips about scanning and assembling everything in the computer. And we need a great cover, too.